How to Create a Raspberry Pi File Server
By Dennis Feliciano
The Initial Setup
This guide has been developed and tested on a Raspberry Pi 2 running Raspbian, based on Debian 9 “Stretch”. The Raspberry Pi Foundation’s website (link) has an easy to setup installer called NOOBS, short for New Out Of the Box Software. For this setup, you will need to connect your Raspberry Pi to a power source (capable of at least 2A, especially for directly connected hard drives), a monitor, mouse and keyboard. Advanced users can proceed with SSH, if setup on their system.
Please note that this guide is not necessarily exclusive to just Raspberry Pi's. For the most part, the same exact steps could be followed for an Ubuntu or Debian-based Linux distribution installed on any device, whether a PC or a Raspberry Pi. A Raspberry Pi is convenient though as it does not use as much electricity as a regular full-fledged computer.
Once you complete this tutorial, you will be able to access files stored on your Raspberry Pi through your smartphone or computer (compatible with Android, iOS, Windows, Linux, macOS). Essentially your Raspberry Pi will be setup to run what's called a Windows (or samba) share, which has the best cross-platform support for use as a file server.

A Raspberry Pi 2 running Raspbian, based on Debian 9 "Stretch". It is attached to a standard 2.5 inch HDD and a 3.5 inch HDD (not shown). For maximum throughput, it is connected via ethernet to the local network.
Install Required Software
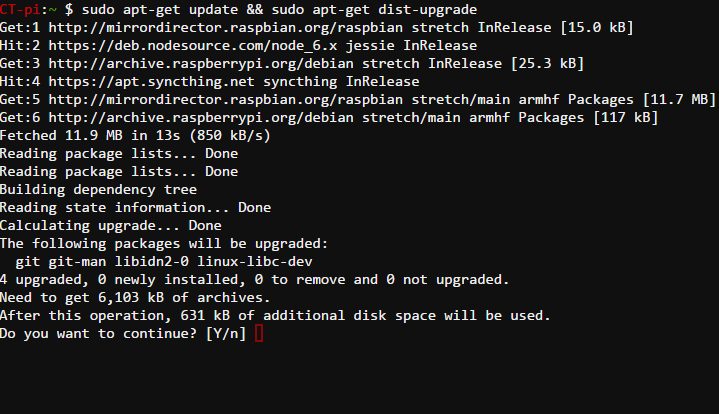
Open the terminal and run the following command to ensure all packages are up to date:
sudo apt-get update && sudo apt-get dist-upgrade
Next install the “samba” package:
sudo apt-get install samba
Next ensure that a text editor is installed. Gedit is a good one if using a desktop environment, otherwise vim or nano work well in command-line only environments. The relevant commands to install your text editor of choice:
sudo apt-get install gedit
sudo apt-get install vim
sudo apt-get install nano
Make sure your Raspberry Pi is up to date before setting up the file server!
Setup File Shares
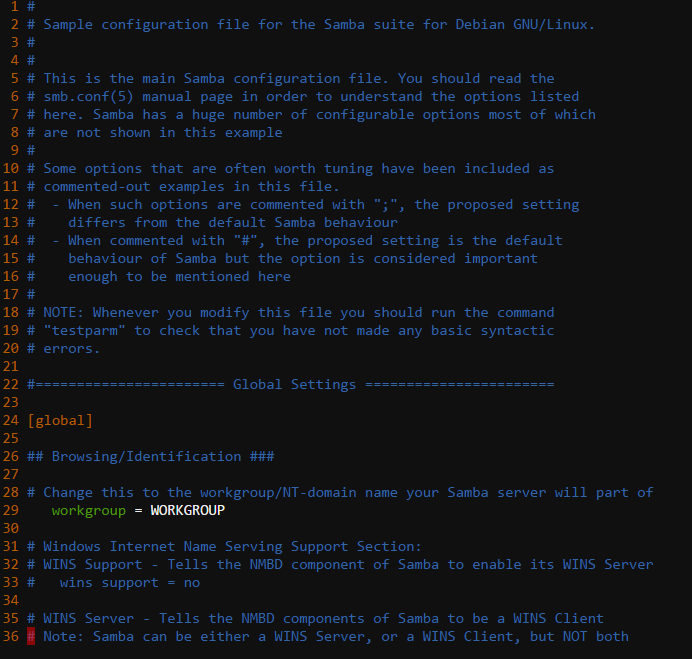
The default configuration file is located at /etc/samba/smb.conf
Access File Share from Client Devices
Now that your raspberry pi has been setup to run the file server, it is time now to view files through your client devices. These devices can include Android smartphones, iPhones, iPads, Windows PCs, MacBooks, and even Chromebooks. Instructions will vary depending on the device in question.
Android
Android devices unfortunately do not have a built-in client for viewing files over the network. No need to worry though as there are plenty of high quality third-party apps available on the Google Play Store. For the purposes of this tutorial, access will be shown through ES File Explorer though there are plenty of other available options to choose from.
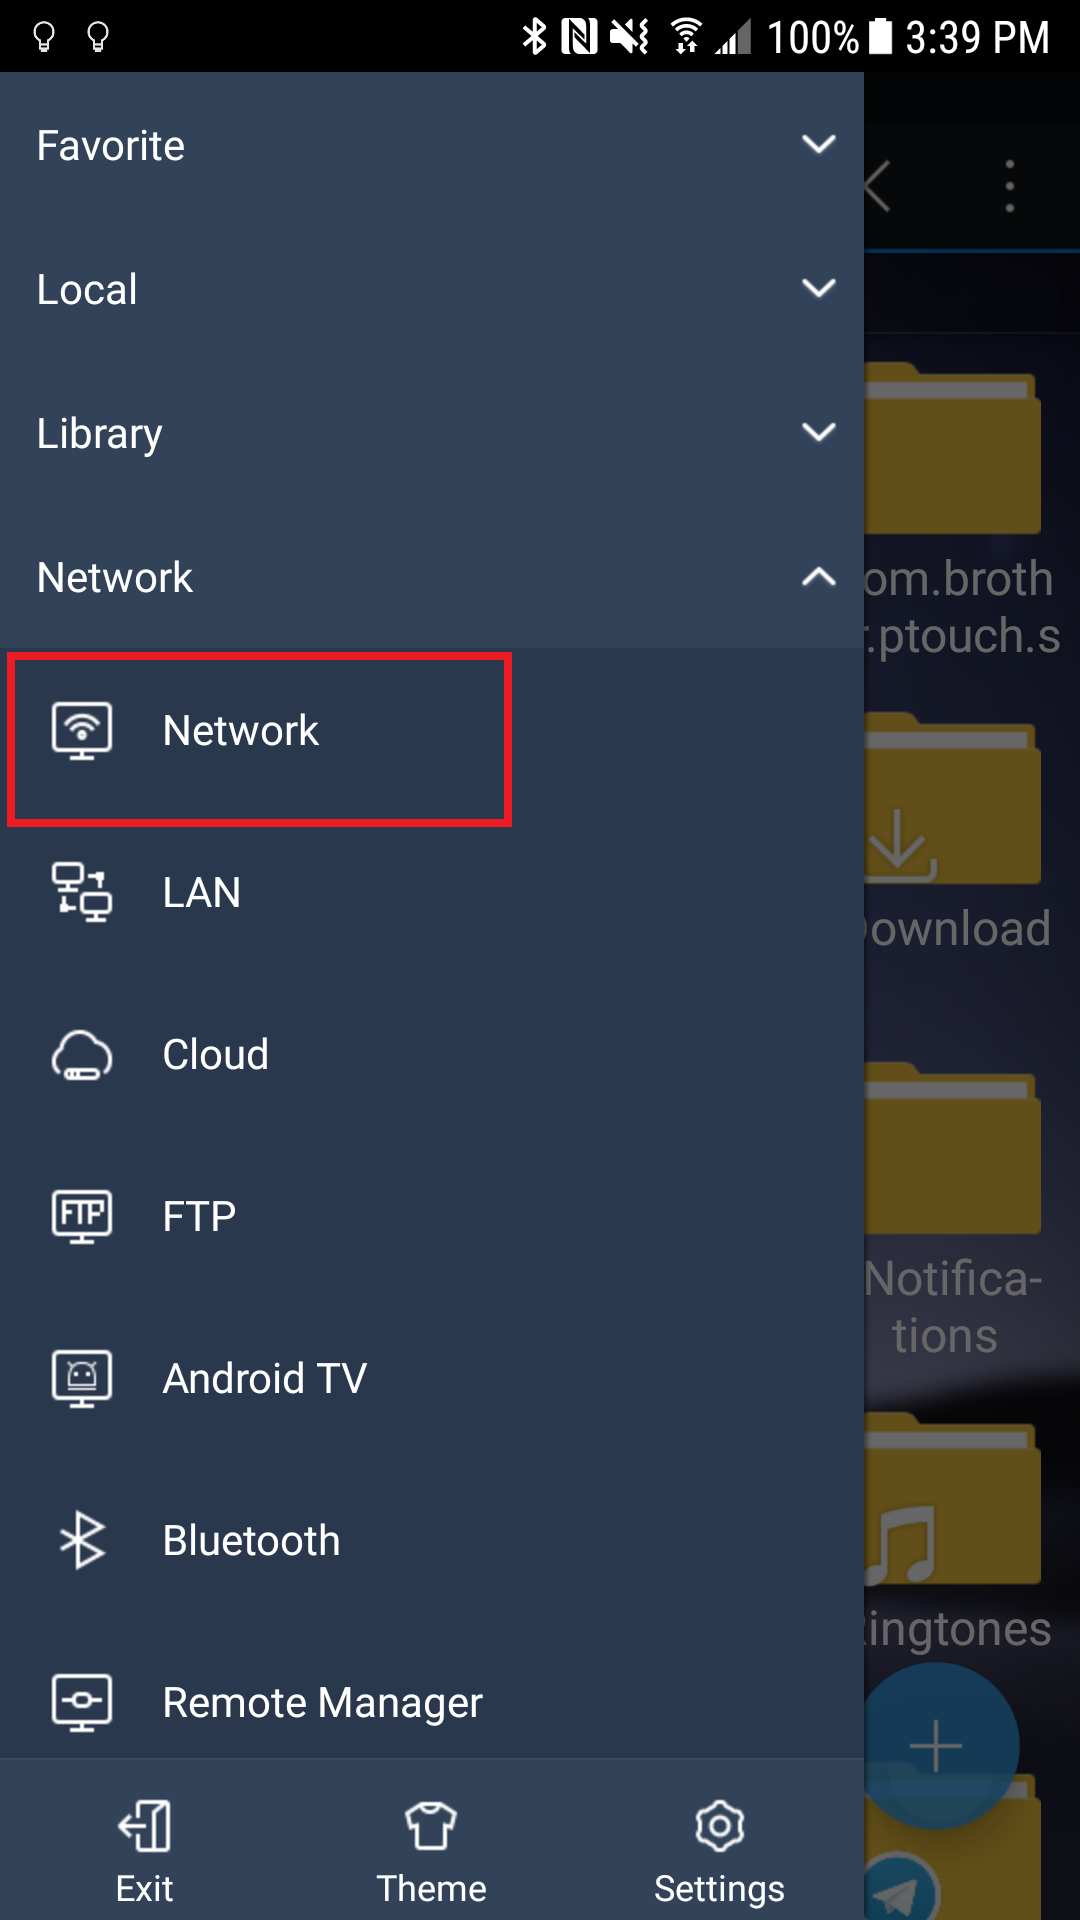
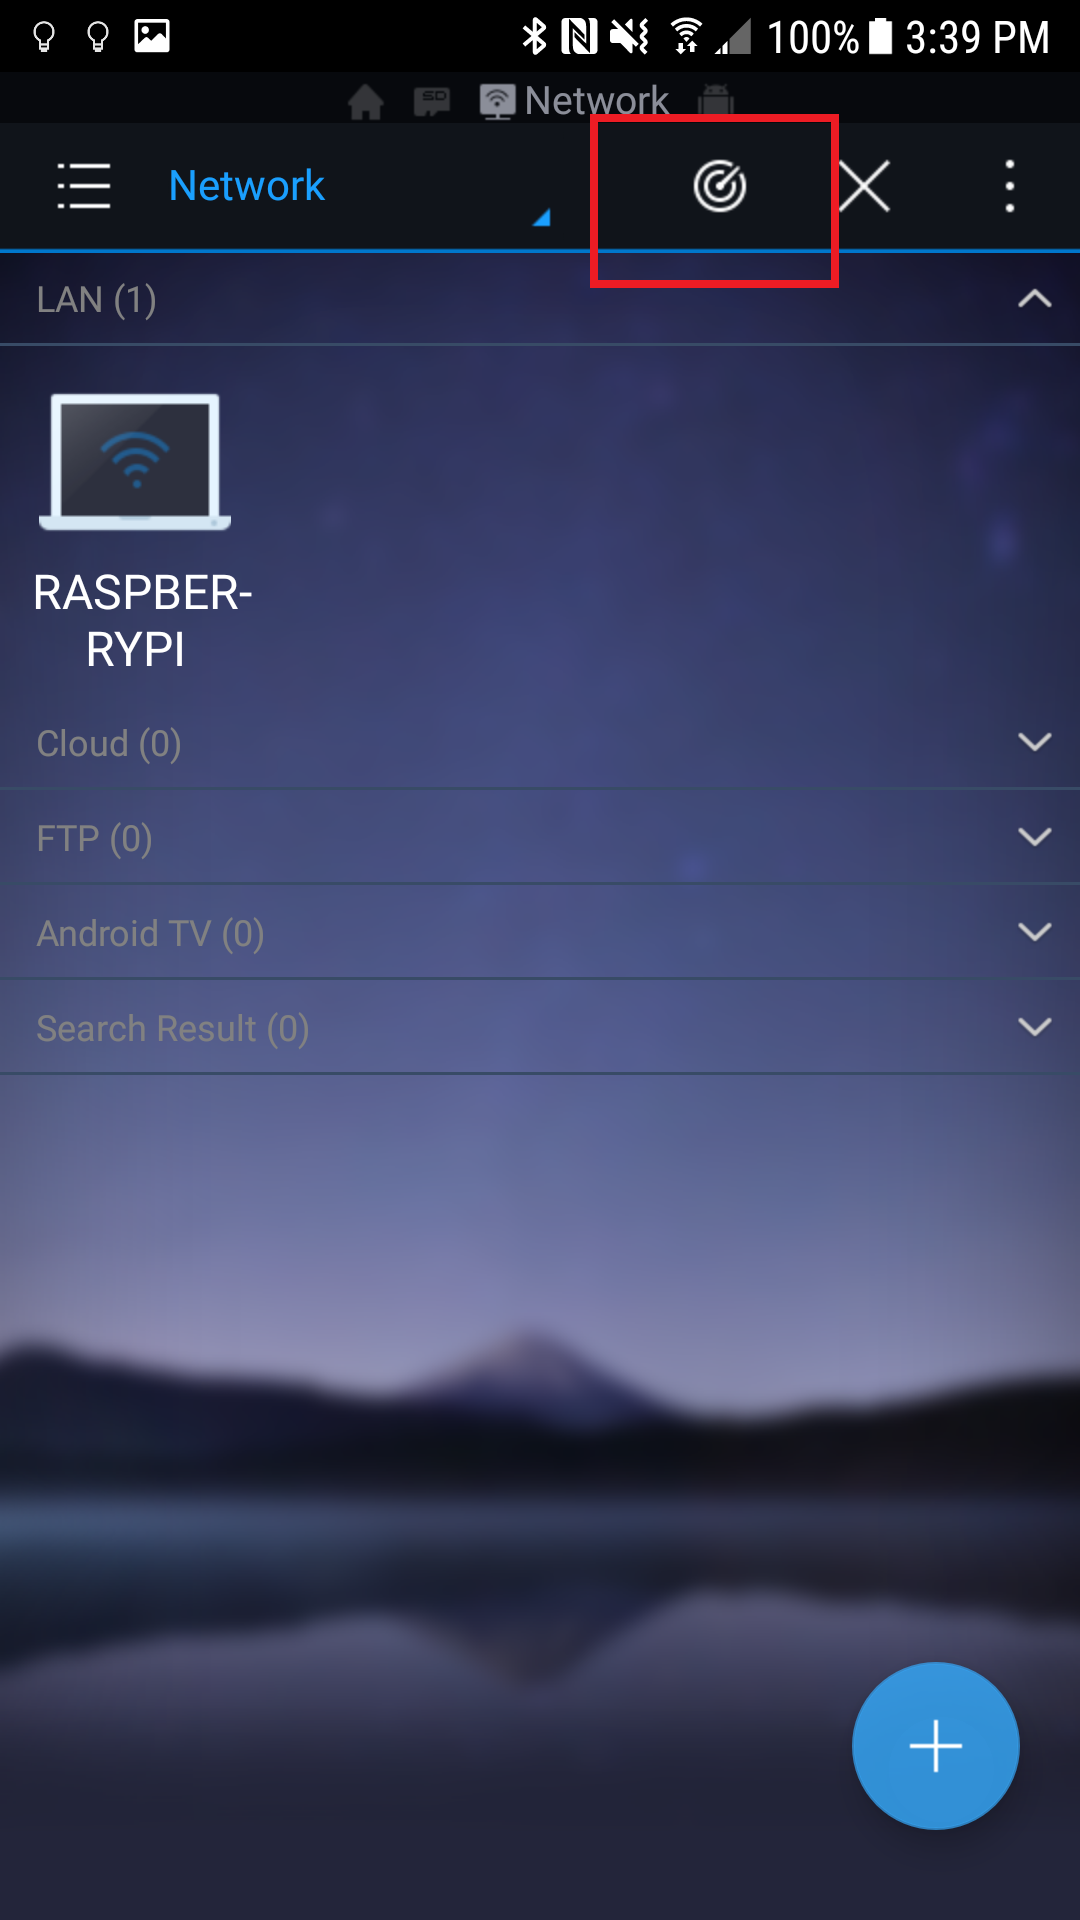
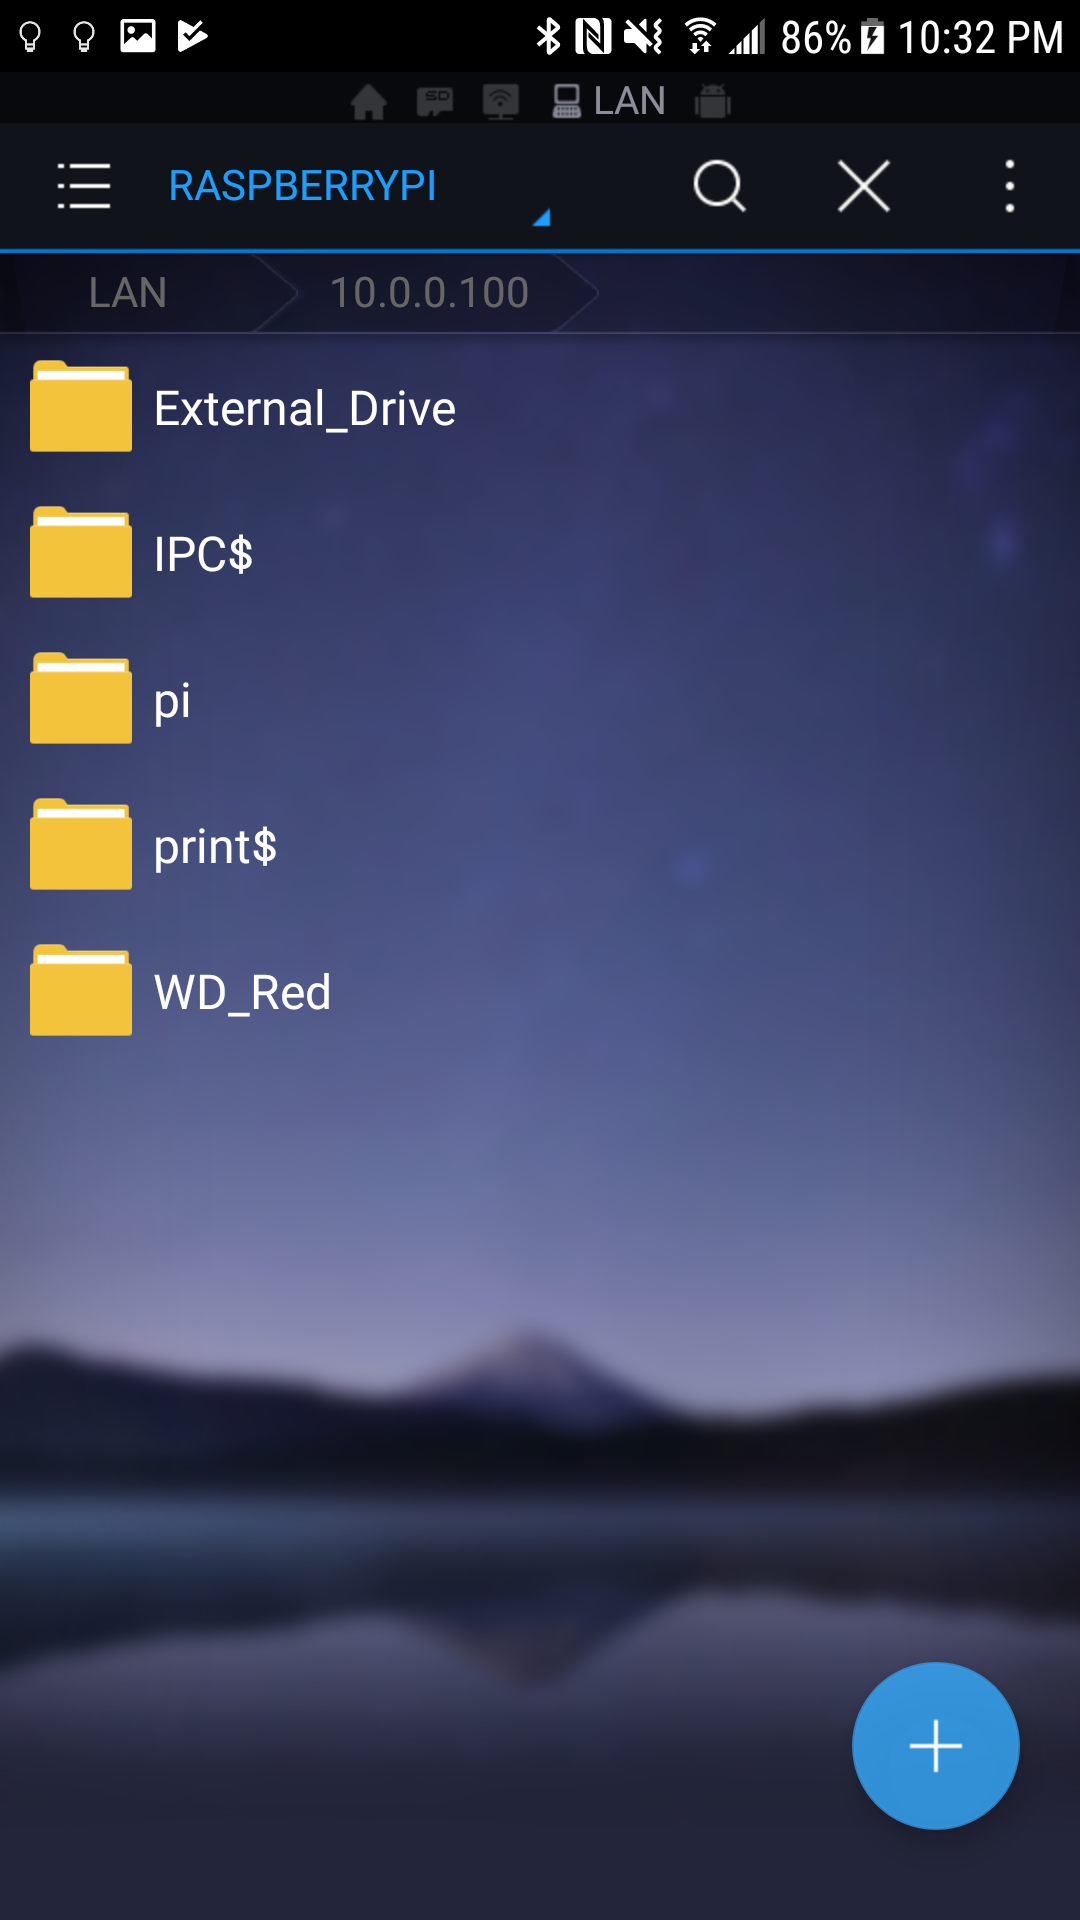
Once the app is installed, open it and swipe from the left to reveal the side menu. Toggle the network panel to reveal the menu and press "Network". From here you will want to touch the icon indicated in the 2nd diagram to the right. This will scan your local network for file servers. Take note of the computers that appear under "LAN". If configured properly, your raspberry pi should appear here.
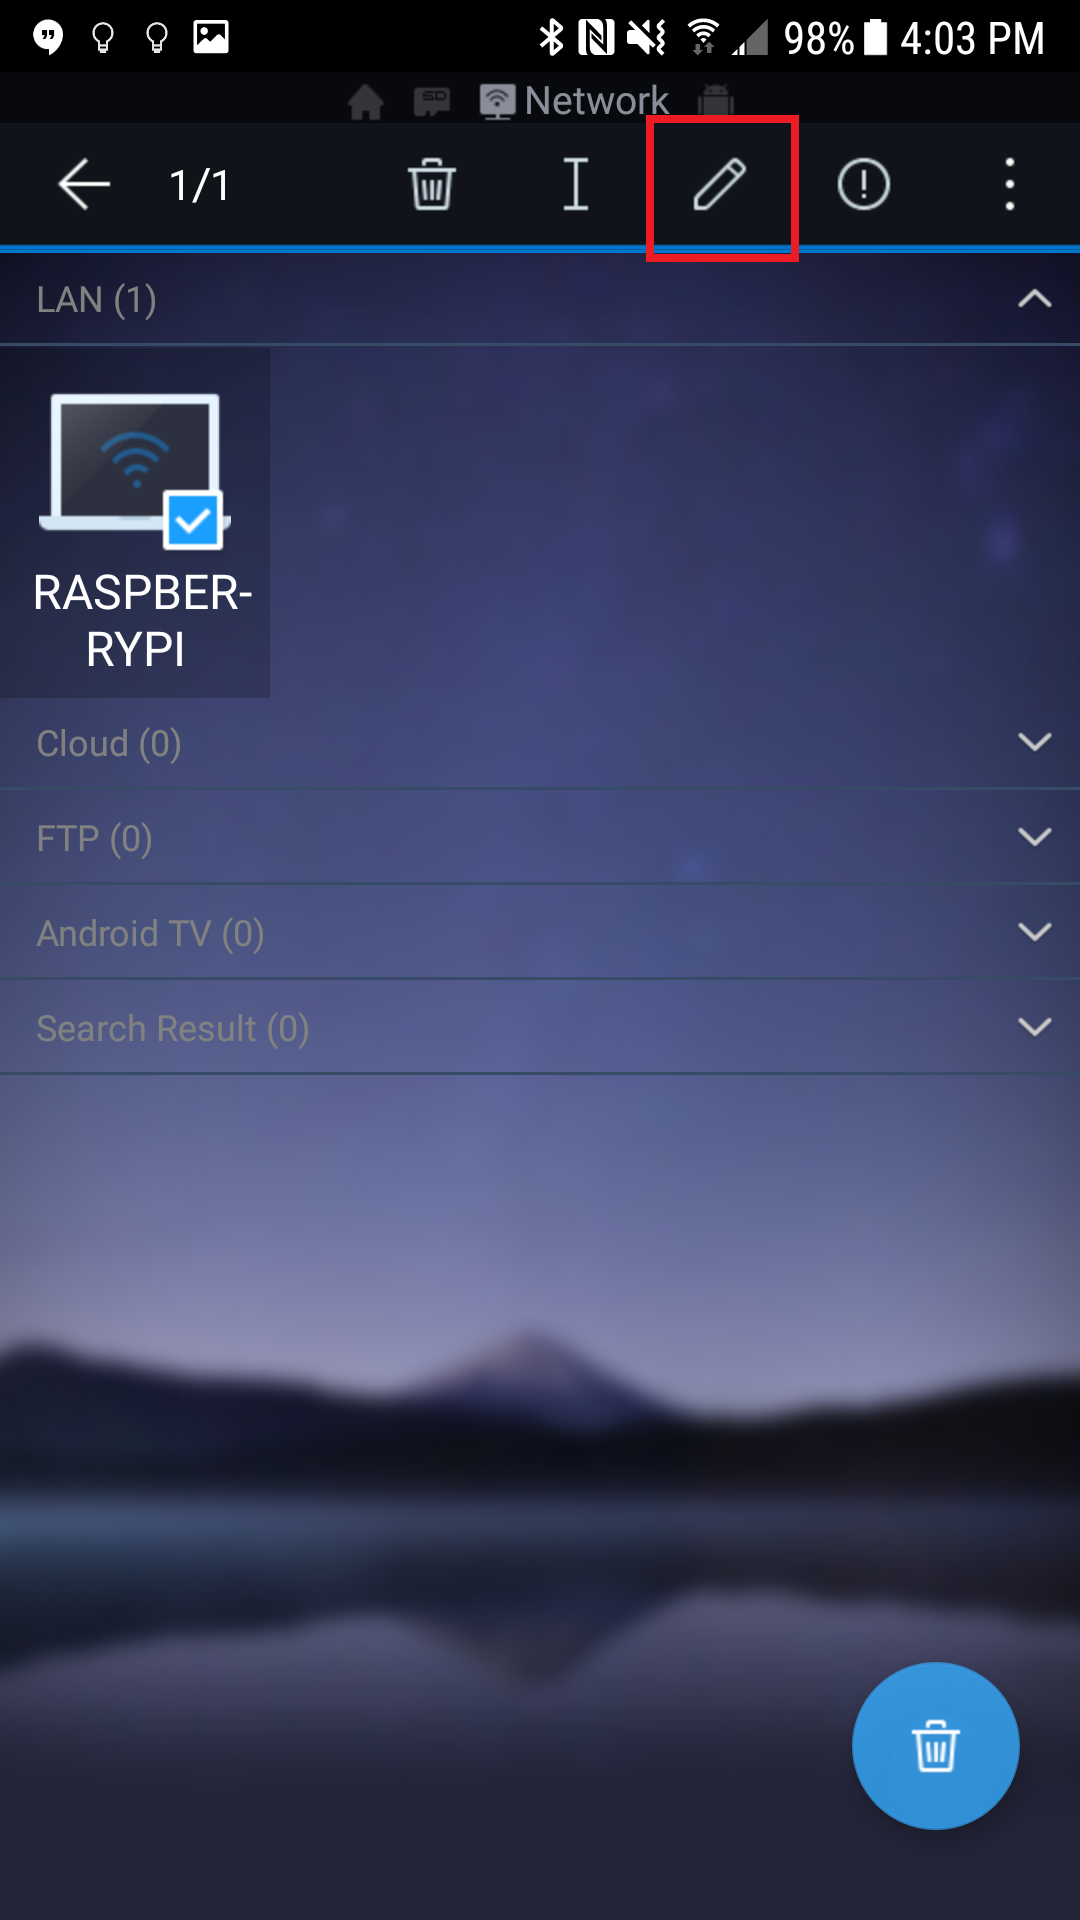
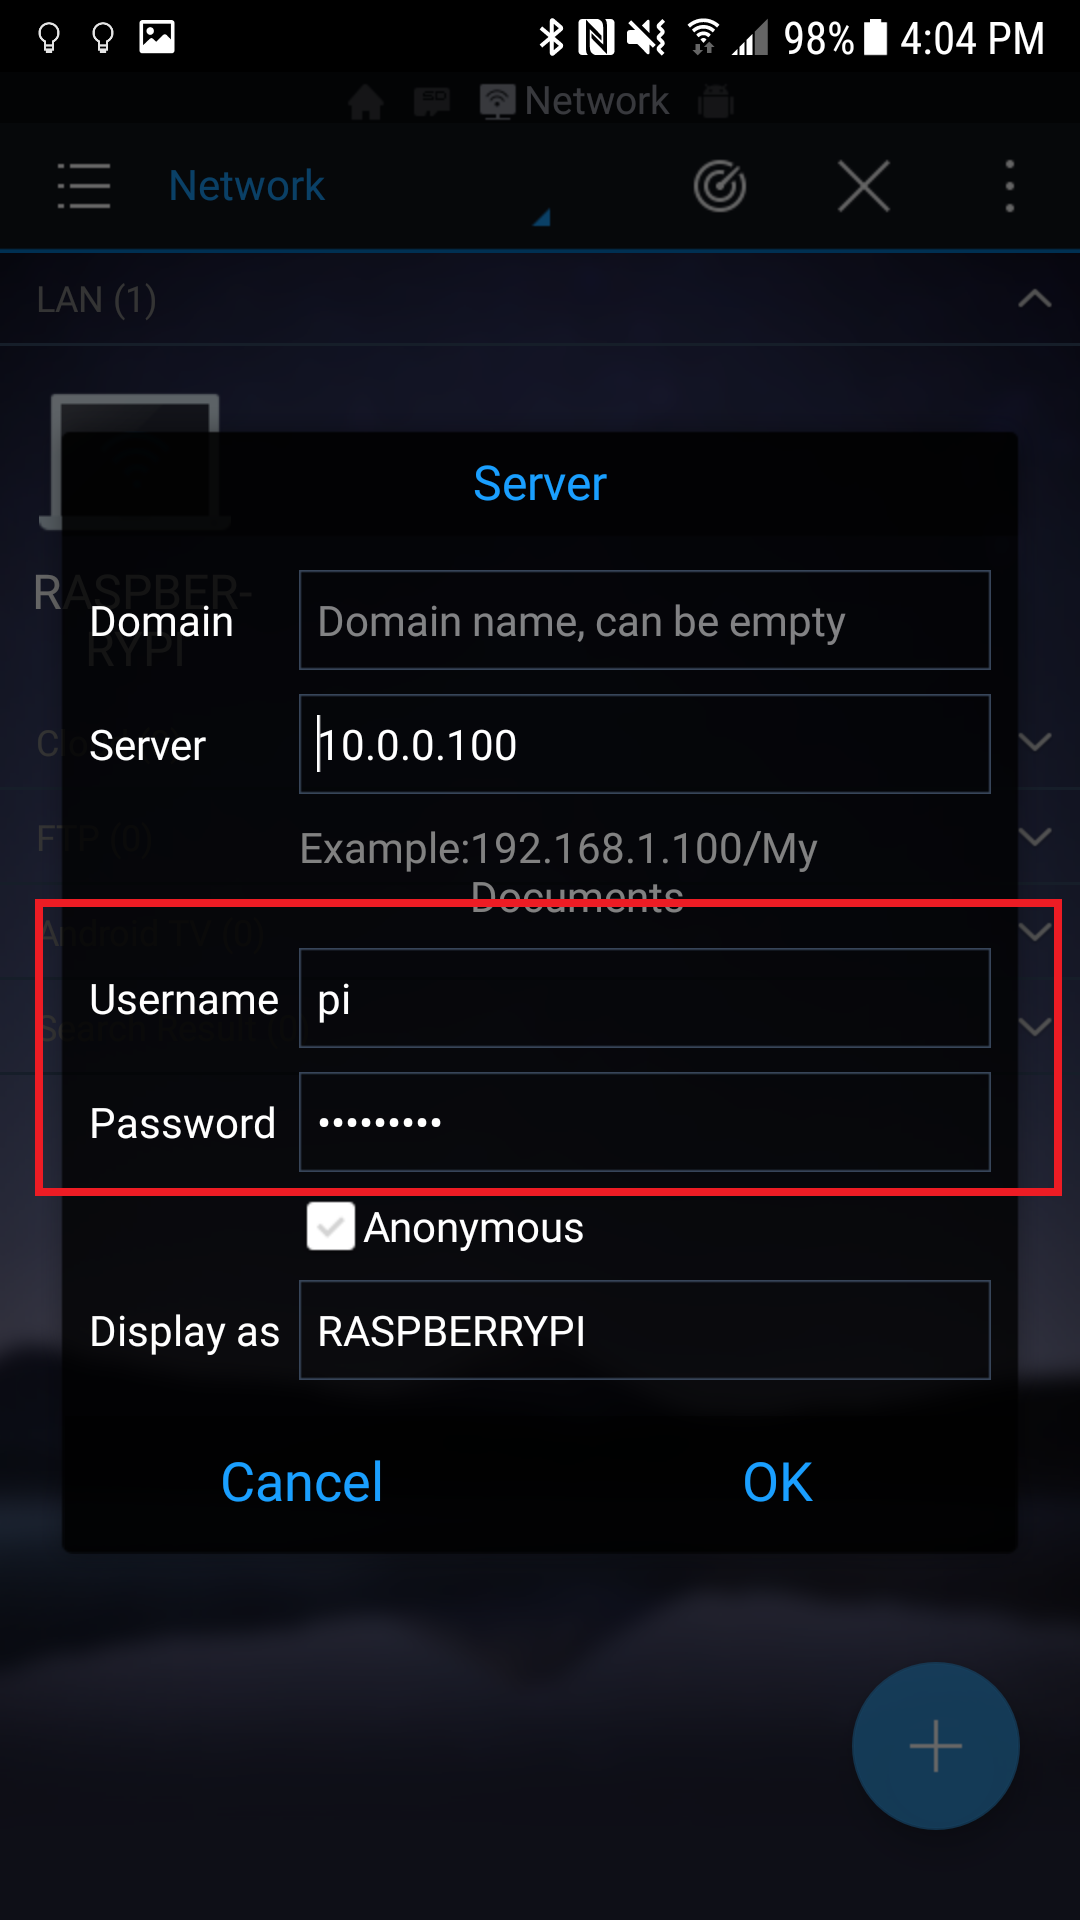
Long press the icon corresponding to your raspberry pi. Press the pencil to edit configuration options of the file server. In particular, you will want to put in your username and password that you previously created. After this, you should be able to connect and view all your files. Note that from ES File Explorer, you are able to copy files over to your phone and do all standard file manipulation operations. You can also stream video and music files to your phone from the Raspberry Pi!